Showing posts with label fruit and veg. Show all posts

Wednesday, 12 August 2015

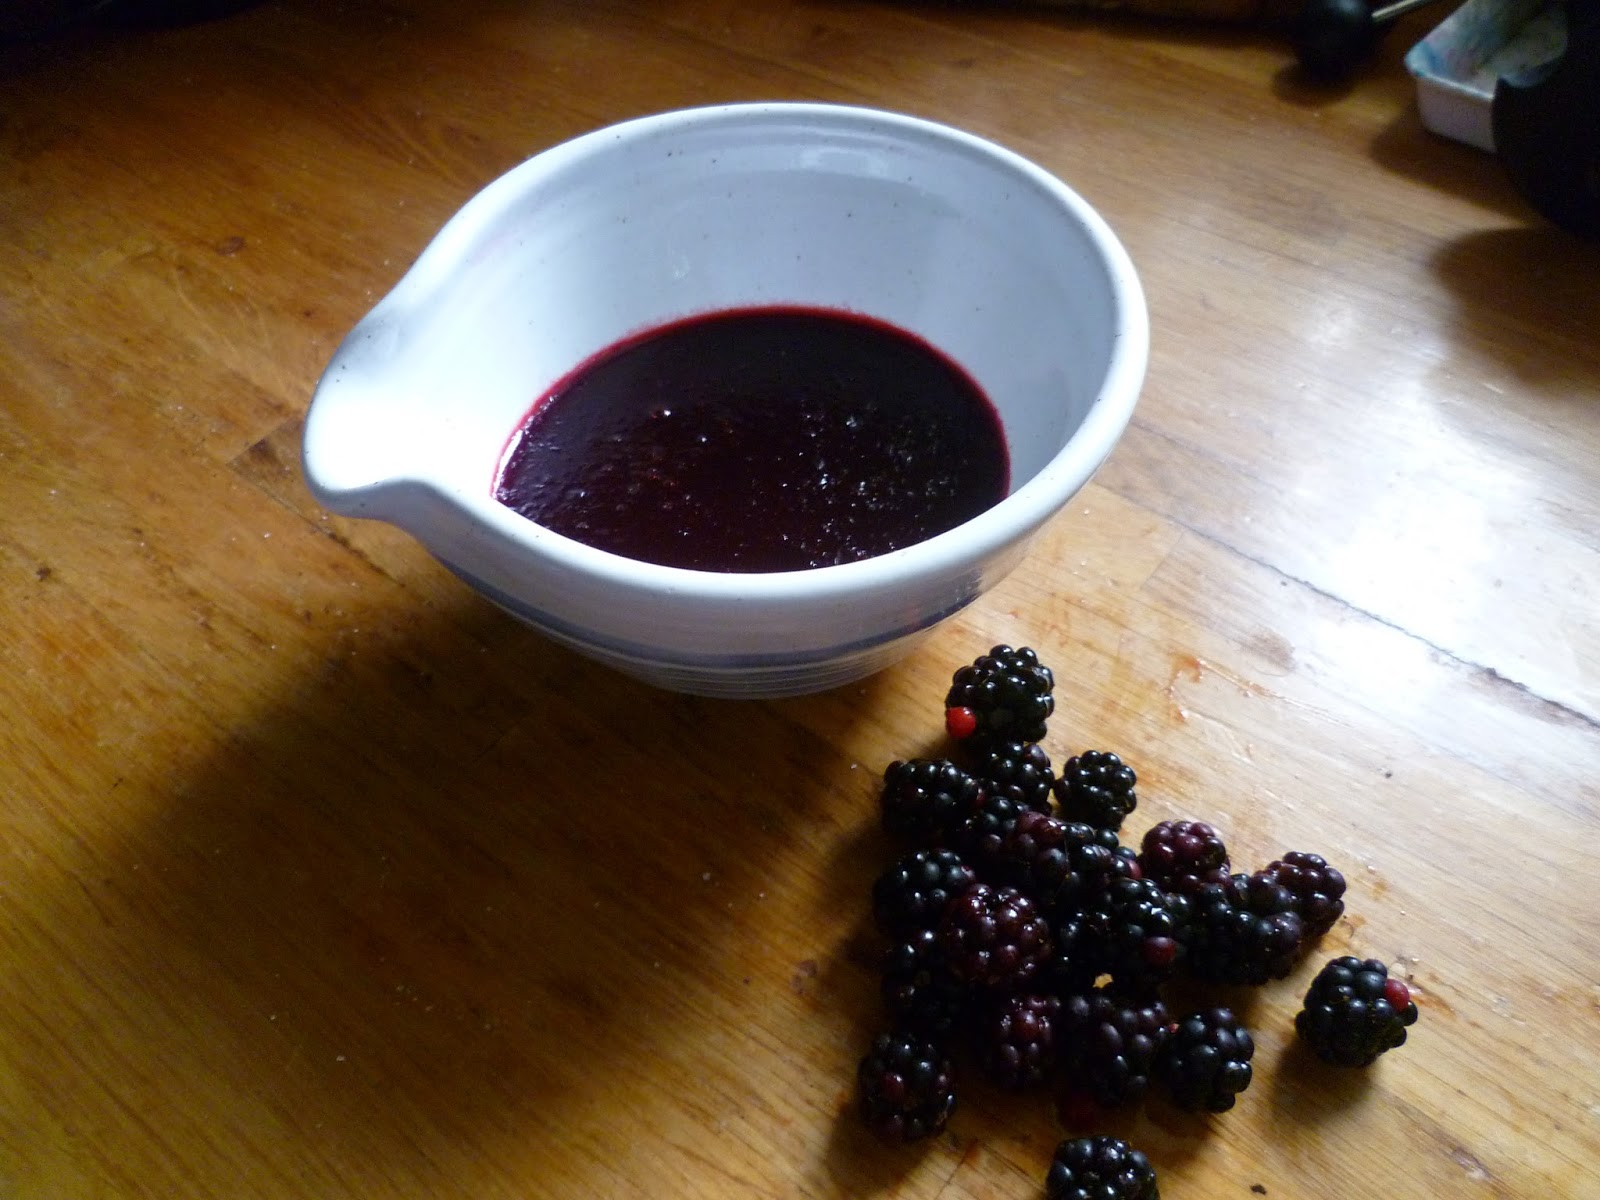
A recipe for rødgrød med fløde


This is a Danish recipe. It’s a red berry soup with cream, or a deconstructed fool, depending on your point of view. We went on a family holiday to Denmark when I was a teenager and we all struggled to get the pronunciation right. It’s almost impossible for non-Danish speakers to say but it goes something like this... Rurr grurr mid fleurrrr. It tastes a lot better than it sounds.

Red berry pudding (serves 2)
You can use any mixture of berries, but if in doubt use raspberries and red currants. I used blackberries with a splash of Pinot Noir to make the rødgrød in the photo and it was lovely. 

350g berries – raspberry, red currant, blackcurrant, or blackberry
100ml water
120g caster sugar, or more to taste
1 ½ tbs corn flour (1 tbs for every 300ml liquid, see below)

Put the berries in a saucepan and add the water. Bring to the boil, and simmer until the fruit has softened, two to five minutes. Sieve the mixture into a bowl, discarding the pips.

Measure the liquid in the bowl. You will need 1 tablespoon of corn flour for every 300ml of liquid, but don’t add it yet.

Put the liquid back in the saucepan and, over a low heat, stir in the sugar until it has dissolved. Taste, and add more sugar if necessary.

In a small bowl, stir the corn flour and two tablespoons of water together until you’ve got a smooth mixture. Ladle a little of the warm berry liquid into the bowl and stir again until it’s smooth.

Stirring all the time, tip the corn flour mixture into the warm berry mixture, turn the heat up and bring the mixture to the boil. Simmer for two minutes, keep stirring, then take off the heat and check you can’t taste the corn flour. If you can, simmer for another minute and check again.


You can either eat it warm or, as the Danish prefer, cold. The traditional accompaniment is lots of whipped cream, but yoghurt also works well. 

Tuesday, 19 May 2015

A recipe for raspberry and coconut ice cream


It was an unexpected sunny weekend. The roses came out. The swallows skimmed the lawn. And we scrambled around on our hands and knees putting squash and courgette plants into the ground. 

The rugosa rose: excellent for making Turkish Delight
In the kitchen, I made some raspberry and coconut ice cream, using up fruit from the freezer. The ingredients are self-explanatory - raspberry, coconut cream, sugar - but by playing around with the quantities - lots of raspberries, not too much coconut cream - you get a pudding with a really punchy fruity flavour.

Raspberry and coconut ice cream

300g raspberries
150g caster sugar
100ml coconut cream (or the solids from a tin of coconut milk)

Sieve the raspberries. Whisk the coconut cream to get rid of any lumps. Combine all three ingredients in a bowl. Stir to dissolve the sugar. Taste and add more sugar if needed. Churn in an ice cream maker. We have this manual one

Wednesday, 18 February 2015

A recipe for squash, red pepper and red chilli soup


This recipe is super-easy. You don't need stock, onions, or spices - just roast the vegetables, blend and add hot water. It has a surprisingly complex flavour - sweet from the squash and red pepper, earthy from the garlic and fiery from the chilli. 

I make so much squash soup at this time of year, as I tend to have lots of squash which aren't fully ripe when I pick them in October (they have to come in before the first frost). So, they all sit on the window sills until they are ready to eat (usually from Christmas time onwards). It's lovely to be eating something so sunny at such a gloomy l time of year. 


Butternut squash, red pepper and red chilli soup (serves two)

500g butternut squash
1 red pepper
1 red chilli
6 cloves garlic
Hot water
Squeeze of lemon

Preheat the oven to 200C, 400F (180C fan).

Peel the butternut squash, cut into chunks about 3cm across. Deseed and chop the red pepper. Put them both in a baking tray with the whole red chilli and the garlic cloves (still in their skins), drizzle with olive oil, sprinkle with salt, and cook for 20-30 minutes, until the vegetables are soft.

Boil the kettle. Scrape the vegetables into a saucepan, pop the garlic cloves out of their skins, and halve and deseed the chilli (you can add whole or half the chilli depending on how hot it is). Blend everything together, pour in the hot water until you have the consistency you like. Squeeze in some lemon juice, add more salt if needed, and top with yoghurt or creme fraiche if you fancy. 

Friday, 6 February 2015

A recipe for traditional marmalade


Last weekend I made marmalade using my granny’s recipe. My mum remembers helping her - picking out the orange pips, cutting up the skins, and watching her stir the mixture in a big brass preserving pan.

The recipe follows the “whole fruit method”. This means you cook the oranges whole, slice up the rind, and then boil it up with sugar to make the classic preserve.

It is the quickest way to make traditional marmalade. It will take you about four hours from start to finish and most of that time is spent waiting for the oranges to either cook or cool.

Seville oranges cooked and ready to be sliced

Traditional marmalade (makes about four jars)

500g Seville oranges (about four)
1 lemon, juiced
1 kg granulated sugar or cane sugar
1 litre water

Scrub the oranges and remove the buttons at the top. Put them in a pan, add 1 litre of water, bring to the boil and simmer gently for about two hours until you can easily pierce the skin with a fork. Leave to cool.

Take the oranges out of the pan and keep the cooking liquid, you should have 800ml (add some water if you don’t have enough). Cut the oranges in half and flick out the pips with a fork. Discard the pips. Cut the orange halves into bits, thick or thin depending on how you like your marmalade.

Put four clean jam jars on a tray and put them in the oven at 100C. Put a saucer in the freezer – you’ll need it later to test whether your marmalade has set.

Put the orange bits and the cooking liquid into a pan. Add the lemon juice and the sugar. Stir over a medium heat until the sugar dissolves.

Bring to the boil and boil hard until setting point is reached. To test for this, take the saucer out of the freezer and put a blob of the mixture on it. Return the saucer to the freezer for two minutes. Take it out and push your finger through the blob. If the blob wrinkles your marmalade has set.


Take the pan off the heat and leave to cool for 10 minutes. Then take the jam jars out of the oven, pour the marmalade into each one, and put the lids on (I use these cellophane lids). Done! 

Monday, 13 October 2014

An attack of tomato blight


I volunteer at the Lewes Organic Allotment Project. It’s in a beautiful spot above the Nevill, where the Downs embrace you and lift you up like a small child to see the view over the town to the sea beyond.The other volunteers are a lovely bunch, and I am also learning a lot about growing fruit and veg...

For example, two weeks ago my tomatoes got blight. This is a nasty fungal infection that often kills the plant and ruins the ruby red fruit. Two years ago, it wiped out my entire crop. However, this year I knew what to do.


When I noticed the first signs of blight (blackened bits of stem and shrivelled leaves) I pulled up the plant and picked all the fruit. I then disposed of the plant, but put the tomatoes in a paper bag with a banana.

The banana gives off ethylene, a hormone which triggers the tomatoes to ripen. Within a week, they were all ready and I could make them into  a small salad for lunch. It was a happy ending to a usually tragic tale. 

Tuesday, 23 September 2014

A handful of raspberries


I was sitting outside having a cup of tea at the weekend. There was a rustle overhead, and I looked up expecting to see a squirrel or a blackbird. But it was not an animal disturbing the leaves; it was the autumn. A leaf fell past my nose.

It’s September, and the countryside seems changed overnight. Conkers carpet the lawn; the Downs are softly blue; winter crops sprout in the fields; and mildew creeps across the veg patch.


In the kitchen I am making lots of jam: raspberry jam (crimson and tart), and damson cheese (purple and potent). Soon it will be time for stews, soups and woolly jumpers. But not yet, not while there are still handfuls of raspberries to pick.


Saturday, 26 July 2014

A slice of gooseberry cheese


I made some gooseberry fruit cheese last week. It’s made by cooking gooseberry puree and sugar together slowly for an hour or so. The finished “cheese” is solid, sunset orange and sliceable.

There is a history of making fruit cheese in the UK, but it’s not popular at the moment. I followed this recipe on Celtnet, but reduced the sugar to 40g for every 100ml of gooseberry puree to retain some of the fruit’s sourness.

Once the preserve was made, the next question was what to eat with it. Fruit cheeses are normally eaten with actual cheese. After a few experiments, we found that ours went particularly well with cheddar and other hard cheeses.

I also thought it complemented grilled mackerel, however other members of the household begged to differ muttering something about how eating fish with jam was a very strange idea.

Gooseberries - topped, tailed and ready to be cooked

Saturday, 12 July 2014

A recipe for raspberry ripple gelato


I went on holiday to Sicily in June. One of the things I loved was the ice cream or gelato – smooth, light, and full of fresh fruit. I discovered that on the island they often make their gelato from whole milk thickened with corn flour - no cream, no eggs.

On my return, I found a recipe for Sicilian-style gelato on David Lebovitz’s blog.  I’ve been experimenting a little since then and this is my best concoction so far, using raspberries which are in season at the moment.

Gratuitous photo of Sicily - it's very pretty

Raspberry ripple gelato (based on David Lebovitz’s recipe for pistachio gelato)

500 ml whole milk (or you can use semi- or skimmed)
2 tbs corn flour
100 g raspberries
6 + tbs caster sugar

Mix the corn flour and four tablespoons of the milk together in a bowl until well-combined.

Heat the milk and four tablespoons of sugar (or more to taste) to just below boiling point (It will be steaming with a few bubbles around the edge). 

Add the corn flour mixture to the milk, bring slowly to the boil and simmer for three minutes, whisking all the time. You only want a very gentle simmer, a few bubbles coming to the surface. Leave to cool, then put it in the fridge to go cold.

In the meantime, make the raspberry sauce by putting the raspberries and two tablespoons of sugar (or more if you prefer) in a bowl in the microwave for 30 seconds.

Mix with a spoon, and it should dissolve into a sauce. If not, heat in 30 second bursts until it does.  If you want to get rid of the pips, push the mixture through a sieve. Leave to cool, and then put in the fridge.

Once both the thickened milk and the sauce are cold, churn the milk in an ice cream maker (we have this manual one), put in a container and then swirl through the raspberry sauce. 

Wednesday, 4 June 2014

How to cook broad beans


Preparation

Broad beans are one of the most delicious spring vegetables, like delicate little green sweets, but you've got to get them out of the wrapper first. Open up the pods and push the beans out with your thumb. 


Cooking

Size matters. If your beans are two centimetres long or less, you can eat them raw or cook them for a minute in boiling water. If they are longer than that, it's best to boil them for two to four minutes until tender, run them under cold water, and then pop them out of their grey-green skins. Why bother? Because it's the difference between eating them because they're good for you, and eating them because they're delicious. 

Flavour combinations

Broad beans are tasty in their own right. Try substituting them for peas in your favourite recipes. However, they go particularly well with cheese (especially goat's cheese), bacon (or any preserved pork), lemon and fresh herbs including mint, parsley and coriander. 


Recipes

Only got a few beans? Can't be bothered to peel them? Got far too many? Never fear, there is a recipe for you...


This Valentine Warner recipe is quick, tasty and really highlights the delicate sweetness of the beans.This is the one to go for if you don't fancy too much peeling. You can use fewer beans than the recipe suggests, and you only need to peel them if they’re really tough. If you’re pushed for time, cut out the onions. 


Broad bean and pea risotto
A really delicious and comforting spring recipe from Brighton and Hove Food Partnership. There's something very therapeutic about stirring a risotto. As an added bonus, this is a great recipe if you don't have that many beans. You can just make up the numbers by adding extra peas. 


An excellent alternative to baked beans. This River Cottage recipe is very simple - just beans, bacon, and spring onion piled onto toast. If you don’t have any spring onion, you could use a clove of garlic instead. This is most enjoyable when the beans are young, tender and don’t need to be peeled. 


This Nigel Slater recipe is a good way to use up a glut of larger beans. He suggests using dill to flavour the hummus, but you could also use mint or coriander. It is worth peeling the beans so that you get a lovely, bright green colour and a really bean-y flavour. But if you don't bother, it'll still taste good. 


Thursday, 24 April 2014

Two good rhubarb recipes


I have never been a fan of rhubarb. But it’s abundant at this time of year, and there’s little else to experiment with pudding-wise. So, for the past few weeks I’ve been trying to find a recipe I like.

I started by making rhubarb compotes. However, I only enjoyed eating them when I used equal quantities of sugar and rhubarb. I took the hint and moved on to jams. 

Rhubarb and ginger jam  

Rhubarb and ginger jam

Rhubarb is low in pectin, so you need to either use jam sugar (which has added pectin) or add another fruit that’s high in pectin (oranges, lemons or apples). Otherwise the jam won’t set.

Using jam sugar cuts the cooking time down to 10 minutes or less.

This BBC recipe was easy and produced a delicious vibrant jam; plum red and punchy.

Rhubarb and orange marmalade

This Lakeland recipe uses oranges to provide the pectin. You take near equal quantities of rhubarb, oranges and sugar, and cook them for 45 minutes.

This produced a very different jam, much more subtle than the first, with a delicate sweetness from the oranges and a faint tang of rhubarb.


Rhubarb and orange ice cream

Rhubarb pudding

The first jam was delicious swirled through yoghurt. 

The second made a lovely marmalade ice cream using the recipe from Sarah Raven’s Garden Cookbook (worth tracking down, you don’t even have to churn the mixture).

Monday, 17 February 2014

A year in my veg patch

At the moment, the only things growing in my veg patch are garlic and parsley. But like wisps of hair on an adolescent boy’s chin, they are signs that more growth is on the way.

It’s time to start thinking about what I want to sow this year.


Last year, the mangetout (Oregon Sugar Pod) was a big success. It started tentatively and I feared it might never break through the soil. Then the warm weather arrived and I had more mangetout than I could eat for almost a month. 

The squash (Waltham Butternut and Red Kuri) took their time – needing an extra two months on the windowsill to ripen – but when they finally made it into the pot they were sweet and mushy in all the right ways.

This year, I’ll try an early squash (Early Butternut) in the hope it will ripen by September, experiment with some more Asian salad leaves (I just grew mustard “Red Giant” last year and really needed more variety).


I’ll also try fennel for the first time, as well as some kale to get me through the winter. Herbs-wise, I’ll have a go at flat leaf parsley and coriander as they grow well in the colder months. Roll on Spring! 

Monday, 3 February 2014

A recipe for squash dip


I harvested my squash in October, and immediately cut one up to make soup.  It was not ready, and the rest spent two months ripening on a warm windowsill. Finally, just in time for Christmas, they were good enough to eat.

We’ve had a lot of squash soup since then, as well as squash risotto, squash dip, squash pizza...

This squash dip is good hot or cold. We spread it on toast and eat it for lunch. I got the idea of putting peanut butter with squash from this very tasty River Cottage soup recipe.


Squash and ginger dip (makes one bowl)

I love the combination of squash and ginger, but you could use garlic and chilli as well.

400g - 500g butternut squash (about half a squash)
Olive oil (or any other cooking oil)
Salt
1 cm chunk of fresh ginger
Squeeze of lemon juice (about 2 tsp)
3 tsp peanut butter
4 - 8 tbs water

Preheat the oven to 200 C, 400 F. Peel the butternut squash, chop into 2cm cubes, and put in a baking tray. Drizzle over the oil and salt, and roast in the oven until soft (about 20 minutes).

Put the roast squash in a food processor, grate in the ginger, and then add the lemon juice, peanut butter and water. Blitz, taste and add more of the ingredients as necessary. You might need more water to get the right consistency. 

Monday, 30 December 2013

A handful of cobnuts


A few weeks ago, we bought some cobnuts from a local fruit farm, Maynards. Like many absent-minded animals before us, we stored them away and then forgot all about them.

On finding them again, we decided to eat them as soon as possible, instead of waiting until everyone arrived for Christmas.
The cobnut season ends in October so they’d already been in store for at least a month. They might be losing their freshness...

Cobnuts

They were delicious. I had forgotten how lovely fresh nuts could taste. The cobnut is a cultivated hazelnut, and is sold fresh unlike most other nuts which are sold dried. This means they have a lovely milky, delicate sweetness.

Over the last few weeks I have sprinkled them on salads (see above), soups and so on, but if I’m honest they are best eaten just as they are.

Saturday, 23 November 2013

A slab of homemade quince cheese


This week, I made some quince cheese. I had some very ugly quinces - covered in black spots, some deformed, some not quite ripe.  However, looks are not important for jam-making; it’s what’s inside that counts.

I decided to try this recipe from epicurious, mainly because it requires only 25 minutes stirring the pot (with some recipes, it’s over an hour). I reduced the amount of sugar (to taste), and added a teaspoon of lemon juice.


It set after only 20 minutes of stirring, and it tasted superb – heady and fragrant, like a warm Mediterranean breeze. Because I reduced the sugar, it may not keep so well, but I don’t think it’ll take us long to polish it off.
These are the quinces I didn't use, but you get the idea. Not pretty.
Apparently, quince has been cultivated for up to 3000 years, and quince cheese was one of the earliest jams. It’s the original and still one of the best in my book.

Friday, 1 November 2013

A bottle of homemade apple juice


A few weeks ago, my Mum dug out her steam juicer. I wasn’t very impressed at first. It extracts juice by steaming chopped fruit, and consists of just three pans stacked on top of each other.

First, she made pear juice (watery yet fragrant), then blackberry juice (fruity but bitter) and finally apple juice made with golden russets (totally delicious – a delicate sweetness followed by a fragrant sharpness). I was converted.

The advantages of this method are that it’s low tech (you just need a hob), low on labour (you just roughly chop up the fruit) and long-lasting (the steam sterilises the juice so it will keep for months in a sealed bottle).


Steam juicer - the chopped fruit goes in the top pan

Homemade apple juice

Ingredients
2 kg apples (these are good juicing varieties)

Kit

Steam juicer (you can buy them online)

Screw top bottles (we used three 750ml wine bottles)

Method
Wash the apples, remove their stalks and roughly chop. Place in the top pan (which looks like a colander).

Put the bottom pan on the hob, pour in boiling water until about two thirds full.
Stack the pans on top of each other, put the plastic hose on the exit pipe and put a clip on the hose (so the juice doesn’t squirt everywhere).
Steam juicer - hose on, clip on, and ready to go

Bring the water back to the boil. Then turn down the heat. You want a steady medium boil. Leave for about an hour to steam.
You can start bottling once the chopped apple looks like it’s given up most of its juice. Check the bottom pan every so often to make sure it doesn’t boil dry.
Put several screw top glass bottles in the oven at 90 degrees Celsius for 10 minutes. Put their lids in a pan of boiling water to sterilise.

Pipe the juice into the hot bottles, making sure the juice goes right up to the top. Put the hot lids on the bottles and screw down firmly.

Once cooled, the level of the juice in the bottle should have fallen. This means a vacuum has formed and it will keep for several months.


A finished bottle - the level has dropped meaning a vacuum has formed

Friday, 18 October 2013

A recipe for courgette goo on toast

What is the best way to cook courgettes? Many food writers recommend sizzling them for up to an hour until they melt into a delicious goo. Now, I have tried this several times over the years and it has always resulted in some very hungry people eating some not-very-tasty mush. However, this week I experimented with a different (and quicker) method and it worked really well...

Courgette goo on toast - yum

Courgette goo on toast (serves 2)

1 medium courgette (about 250g)
1 medium onion (if you’re pushed for time, leave this out)
1 or 2 garlic cloves
Olive oil
Salt

Chop up the onion nice and small, then fry over a low-medium heat until it’s starting to go translucent but not brown (5 -10 minutes).

Grate the courgette and squeeze out as much moisture as possible over the sink.
Chop the garlic clove(s) and add to the onions. Fry gently for about 30 seconds.
Add the courgette and a pinch of salt, and cook on a medium heat so that it doesn’t brown but instead slowly melts into a paste (about 15 minutes).
Serve warm on toast. 
Courgettes from the garden